(Credits to Nelleke Pieters)

Under the dense foliage of the Ancient Forests, dark secrets and great wonders are hidden.
These woods hide incredible and strange things but also mortal perils which waiting all the brave... or fools .. who decide to venture inside them.
For every self-respecting campaign or battlefield worthy of the name, wooded areas must be present.
These woods or forests - call them what you want - serve both to give variety to the playing field and to make it pleasing to the eye but above all they represent interesting tactical challenges for adventurers who have to choose from time to time whether to cross them, circumvent them, exploit them or keep to them at proper distance.
 |
| (Credits to GeniusFetus) .... Taking the shortcut wasn’t a good idea! |
The composition of your side, the type of threat faced, the victory conditions of the missions or the special rules of the scenario are all elements that influence the choices to be made during the battle and that go to give the clash a new level of involvement and of tactical depth, thus making the game much more engaging and fun.
—————————-
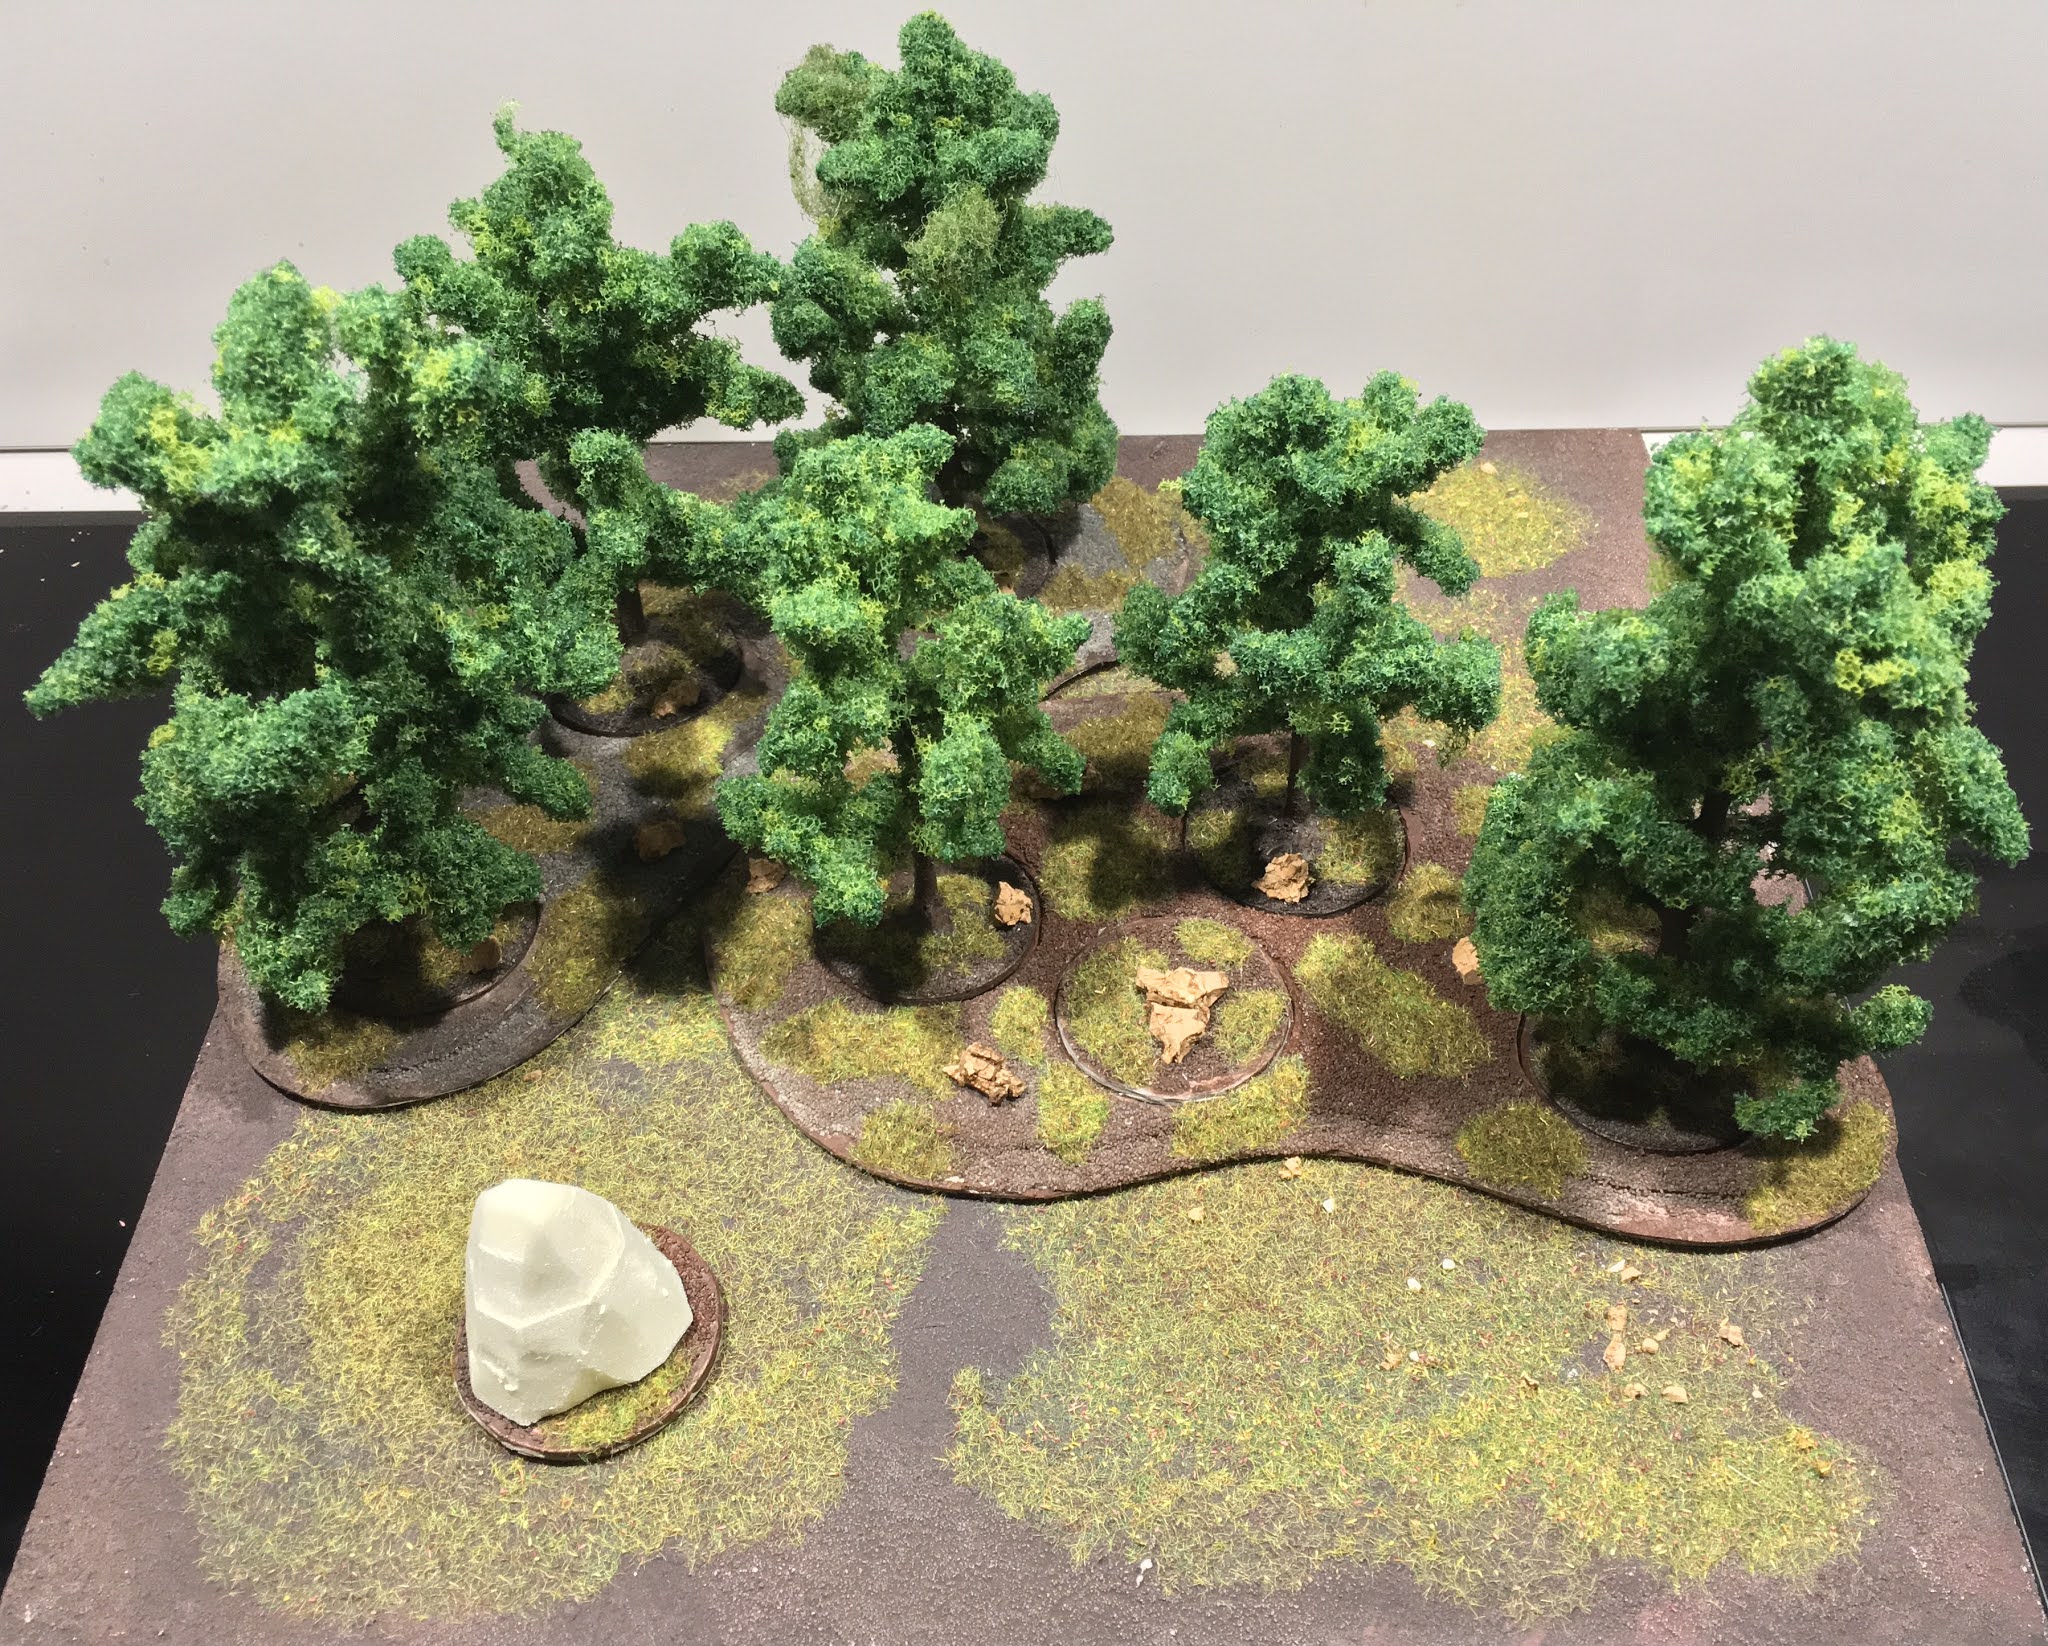
Here I’ll show you my trees on the forest bases I done.
You could see all the steps to create them.
MATERIAL LIST:
- Trees
- Grey cardboard 2mm
- Fine sands
- Vinyl glue
- Small pieces of cork
- Cyanoacrylate glue
- Water based colors
- Spray bottle
- Brushes
- 2 shades of flock
I’ll skip photo of basic steps.
Buy trees that fit your idea of forest/budget/color/height/shape... or build them (after several year of DIY, I opted for invest some money in trees that would satisfay me during time). I chosen HEKI's Deciduous Trees - Set of 8 (10/15 cm tall), roughly 20 euros.
Using a spray bottle, make the trees stronger by covering them with a thin layer of diluted vinyl glue.
 |
| HEKI Trees |
Then place them on the grey cardboard, giving enough space among them. Cut the shape and double it (pay attention to resize the second one - just a little small of the first one).
TIP: I suggest you to create roundish bases of differents sizes but with complementar silhouettes.
Cut out the rounds for the trees bases (widen the cut by 1mm), leaving enough space from the borders.
Glue the layers and when dried lay the upper surface with glue then cover all with the fine sand (pay attention to no cover the holes with glue to avoid troubles when you fit the trees on the bases).
Paint them with medium-dark brown.
Repeat these phases for the round bases to glue under the trees.
When dried, using a brush put some spot of vinyl glue on the bases and sprinkle some flock on them (mixing 2 shades).

Push it down with fingers, wait few second then remove any excess (I prefer reverse the base then firmly tap - this seems align better the grass).
Cover with grass also the tree.


I creates some more rounds to wide the options (I’ll use them as marker, targets... or only to give more space on the base during battle - temporarily removing trees).

Paint these pieces and the ground using the dry brush technique.
ET VOILA!
I hope you liked this tutorials.. I not discovery hot water, I learn this from others but I develop my styles and I hope it was inspirational.
Thanks for reading!
No comments:
Post a Comment